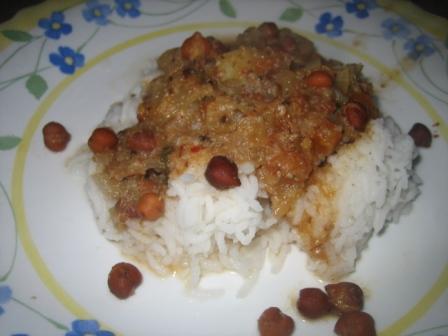
Friday, November 17, 2006

Chickpea Pulusu

After blogging a few months now, my 'Recipes to Try' list has gone through the roof. I thought I should bring it down a bit so I focused on trying the things I wanted to try.
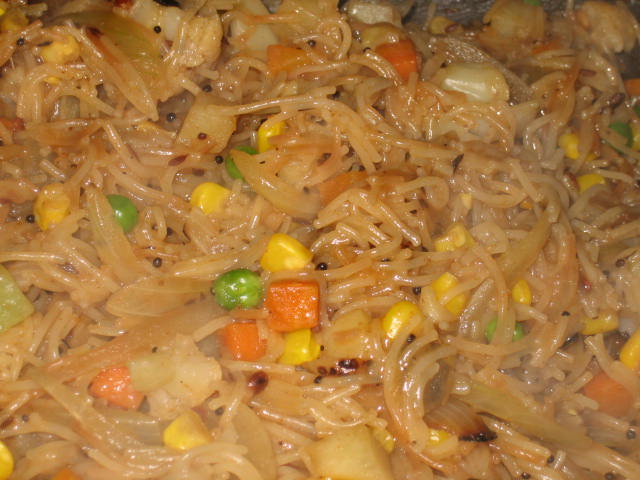
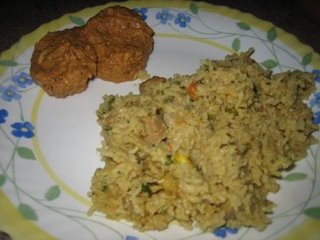
I started off with Nandita's Egg Curry and paired it with Sailu's Soya Chunks Vegetable Pulao
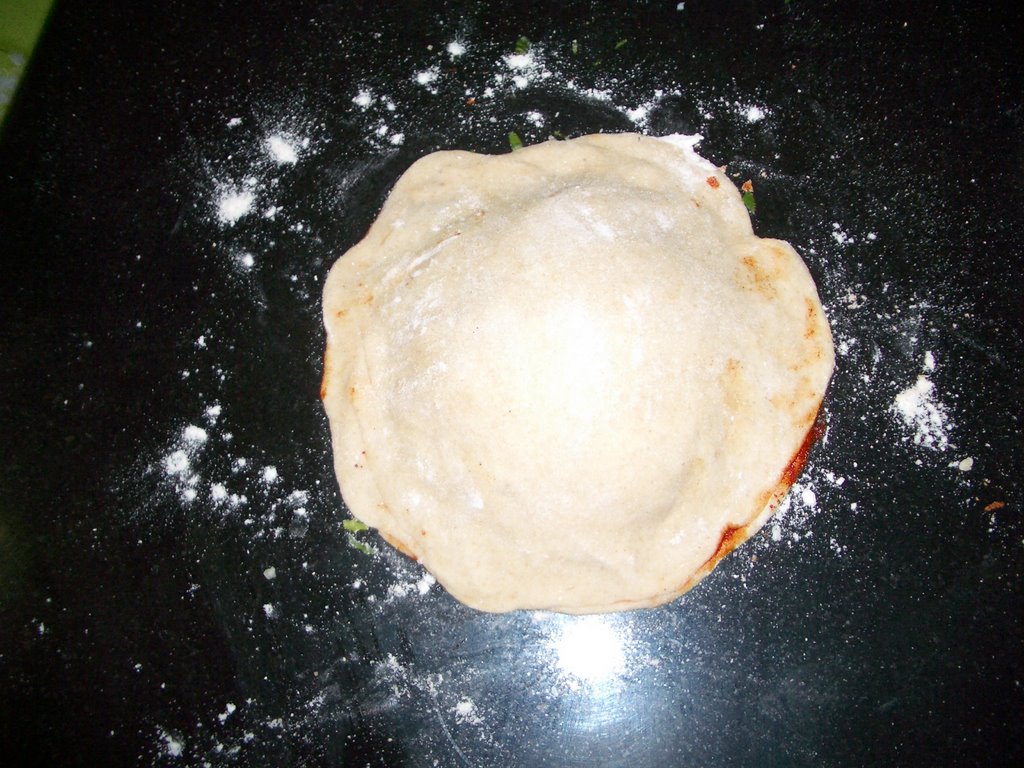
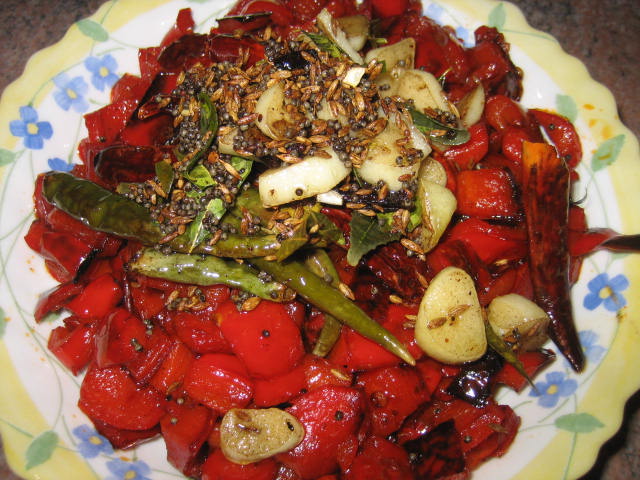
My hubby is not big on potato so I had to venture out and get my a bag of potatoes to make us Rooma's Jhatpat Aloo Paratha with a bit of potato curry. And since I had bit more time up my sleeve I made Zuccini Chutney. This the same recipe as my Red Capsicum Chutney but instead of capsicum, I made with zuccini. These chutneys are so handy I don't know what I did before them :)
And everyday I add more and more that I think hubby will never say, 'What! We have that again?'. And I would like to thank to all for sharing all your recipes that keeps the variety in my kitchen and the balance in my diet.
I know I am late for Meeta's Monthly Mingle but I am hoping she accepts my post as my way giving thanks to you all. So here goes.
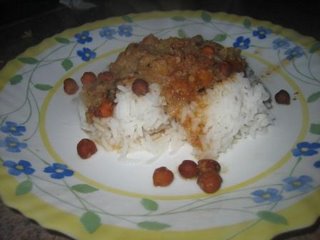
This recipe is actually my mother in law's and knowing my love for all things beany, she made this for me. It is quick and simple and great way to satisfy my urge for beans :).
Chickpea Pulusu

Ingredients
1/2 cup chickpeas- I made this with the small brown chickpeas. You can make it with any bean you prefer such as black eyed beans.
2 small onion
1 small tomato- diced.
1 small potato - diced.
4 dried red chillies- fried in a bit of oil.
1/2 cup fresh or frozen coconut
1 tsp coriander powder- freshly roasted and ground.
1/2 tsp cummin powder- freshly roasted and ground.
2 stalks fresh coriander- finely chopped.
1 lime sized ball of tamarind- soaked.
1 tsp salt- adjust as required.

Method
  1. Soak the beans overnight and then pressure cook until tender
  2. Grind together: coconut, fried dried red chilies, coriander powder, cummin powder, 1/2 an onion. This is your masala base.
  3. In a saucepan, add the masala, salt, tamarind pulp, cooked chickpeas, potoato, remaining onion (diced), tomato. I usually reserved about 1/4 of the chickpeas which I grind and add to the pulusu to make the gravy thicker.
  4. Bring to the boil and then simmer until the potato is cooked.

Labels: , , ,

Saturday, October 14, 2006

Kanpur Chapathi

I know what you are thinking. It is just like all the other adventures I embark upon. After the inital 'honeymoon' phase of about a week, and the excitment dies down, another hobby of mine gets put onto the shelf of unfinished projects. I guess food blogging isn't really a project, but an ongoing hobby, I thought I would stick to it for more than I have.

Don't get me wrong, when ever I have time I will read all the other blogs but writing mine is bit of a pain. As I don't have access to this blog at work, my options are limited to writing all of this from home. And I have to admit I am a big couch potato. Thus I usually just come home and sit in front of the TV. However now that I have a laptop I am doing this whilst sitting in front of the TV.

But I'll admit to the real reason that I have continued to write these blogs. Actually there is two. It is a brilliant way to index all the recipes that I have and like. Currently I have a big folder that I have just printed off recipes for various sources and stored them in. This is good as I can also search for recipes I like.

But the more important reason is that even though I have written only a few posts, I am getting apprieciation from people that I know and people that I don't know. Friends are using the recipes I put up and strangers (well my new 'friends' from the blogging world' are giving me encourgement. People like Saffron Hut thought my choice of blog name was good! :)

Anyway the real purpose of this blog, Kanpur Chapathi. The point where my mum wants me to make a dish as she thinks I can make it better or doesn't know how to make it, is the point that I truly believe that I have mastered the skill of cooking (well not mastered but aleast I can say I can now cook!) This is one dish that my mum loves.

I came across this for the first time when I went to India. I had visited many of my husband's family (for the first time) and we visited one my husband's cousin's who made this for me. And I just ate as many as I could with no hesitation (in Telugu there is a saying, "siggu ley kunda"). I soon found out that even my mother in law can make this. So when she came over to visit, it was the first thing I asked her to make.

So back to the actual dish. It is a quite a simple dish if you think about. It is a bit fiddly but worth it. And as a bonus you don't really have to make a curry to go along with it.

Kanpur Chapathi

Ingredients
2 cups Wholemeal flour (Atta)
1 cup fresh fenugreek leaves- chopped.
1 cup fresh or frozen coconut
1 1/2 cups onions - finely chopped. When I mean finely I mean finely as you won't be able to roll it out the chapathi if it is not finely.
salt
chilli powder
oil

Method
  1. Mix the atta as would for normal chapathi. This means add a bit of salt and enough water to make a firm dough.
  2. Mix salt, chilli powder and oil into a smooth paste.
  3. Mix the onions, fenugreek leaves and coconut in a bowl.
  4. Roll out two lumps (about the size of lemon) of the dough into a puri size (this is probably about the size of a CD)
  5. Spread the salt, chilli paste onto the two puris.
  6. Put a little bit of the fenugreek leaves, coconut and onions mixture onto one of the puris.
  7. Now take the other puri and put it on top of the filled puri and seal it. This part is a bit tricky but with a little practice it ain't too bad.
  8. Now roll it out and toast it on a pan over a low heat on both sides.

    And after making this, it was sooooo inviting that I forgot to take a photo of the finished product!
  9. When eating it, you can split it and put some lemon juice. It is sort of up to you. I like it with though.

Labels: , , , ,

Sunday, August 20, 2006

Semiya Upma

Living in a foreign country, most people refer to breakfast as being toast, cereal and orange juice. I had a traditional Indian mum and a hard core Andhra husband (I think mentioned this already!). This means that my breakfasts was far from the typical Aussie breakfast. When people ask me what I had for breakfast I struggle to answer. This is because I don't know how to explain what idli, dosas, attukulu, uggani (and the list goes on) even on weekdays. So when I came across Nandita's Breakfast blogging I thought this was good opportunity to explain my typical breakfast.

Due to demanding time constraints on weekday morning, my mum used to try and do breakfast that will only take 20 minutes from start to finish. One of these breakfasts was upma (can loosely to be considered a semolina porridge). And I used to hate it. She was either forced to make an alternative (well really give me the leftovers) or I resorted to 2 minute noodles. Now that I have my own place and I am doing the cooking, we have upma about once a week. And I eat it. But my standard upma stories later.

Semiya upma is a good alternative to me as I like it and it is quick. Semiya is a rice vermicelli that is more like thin spagheti rather than the thin chinese vermicelli. It is quick fix in the morning and good start to the day.

Semiya Upma

Ingredients
2 cups Semiya - you find this in all indian grocery stores
1 medium onion - sliced
1 cup mixed vegetables - I use frozen, you can use fresh but note the time will drastically increase!
2 green chillies - finely chopped
1 tsp mustard seeds
1 tsp cumin
1 tsp pulao masala - MTR brand is good
a few curry leaves
1/4 tsp hing
salt to taste

Method
  1. Toast the semiya until golden brown.
  2. In a little oil, splutter the mustard seeds. Add cumin, curry leaves and hing.
  3. Set the flame to a high - medium. Add the onion and chillies. Fry until onion is golden brown.
  4. Add vegetables and fry until almost tender.
  5. Add masala powder, salt and the semiya.
  6. Mix for a few seconds and boiling water to just cover the whole mix.
  7. Reduce the flame to a medium low.
  8. Cook until semiya is cooked. Will take about 3 to 5 minutes.


I guess this my first submission to Nandita's Breakfast blogging.
Just realised it has been moved to Pavani's Cook's Hideout so I guess it'll be there!

Labels: , ,

Red Capsicum Chutney

After a western dish, I thought I should follow with an indian red capsicum dish. Since I had some red capsicums (I think americans call it red bell pepper) left over I thought I would make a chutney.

When my mother in law came over from India last year we went to Lakshmi aunty's house. There she had red capsicum chutney and has not forgotten since. Everytime I speak to my mother in law she asks if I have got the recipe of Lakshmi aunty. And of course every time I forget. But now I actually remembered and since they were on sale, I bought a few.

However after discovering food blogs I came across Indira's version of the chutney. You know how some recipes you read and you just think that it will turn out excellent. Well this was one of them. Then I was in a state of confusion. Shall I make it Lakshmi aunty's way (which I can't even remember tasting) or Indira's. I thought I would make both. So I started getting all the ingredients for Indira's. However I went to the cupboard and realised that I had 2 peanuts left. Hence I bookmarked Indira's recipe and decided to go with Lakshmi aunty's. However I realised Lakshmi aunty's was simple but really really yummy.

This is a quick chutney that we had with rice, on bread, as a dip and just like that. A truly versatile chutney.


Red Capsicum Chutney

Ingredients
3 red capsicums - deseeded and chopped
2 dried red chillies - torn to bits
2 or 3 fresh green chillies - cut into two
3 or 4 cloves garlic - chopped
1 tsp mustard seeds
1 tsp cumin
a few curry leaves (fresh is best)
1 tsp oil
a small bit of tamarind - soaked in warm water
salt to taste

Method
  1. Fry capsicums until soft.
  2. Heat a little oil and add mustard seeds. Once they splutter, add the cumin and fry a few seconds. Add a couple of curry leaves.
  3. Add garlic and fry until light brown.
  4. Add green and red chillies and fry for a few seconds.
  5. Once all fried ingredients are cool, grind with salt to taste and tamarind pulp.

You can redo the mustard, cumin, curry leaves (and hing) tempering to add but I prefer not to.

Labels: ,

Wednesday, August 16, 2006

Krishna Janmashtami Shubakankshalu


Krishna Janmashtami is a festival of Lord Krishna's birthday. Hence I woke up early to celebrate. It is said that along with rangoli, you should draw little feet of krishna coming into the house as to welcome him into your home. I have never been a great rangoli drawer but thanks to the internet I found some good sites (in particular this one) that will help even the artistically challenged (such as myself). So I found this pattern that was small enough that I could do before work (it is Wednesday after all) and still nice enough to entice little ol Krishna. I know that most of you are thinking my god it will make Krishna run in the opposite direction but as I always say 'PRACTICE MAKES PERFECT' so I am going to continue doing rangoli and hopefully Krishna will turn around.


I thought what better way to start my food blogging than doing a recipe of Prasadam. Prasadam is a generic name for all food that is offered to god. However in my home this prasadam is the most popular and is a must when we do any sort of poojas (religious rituals). My mum is famous for hers and mine didn't turn out quite as nice but still not too bad.

Prasadam Recipe

Ingredients
1 cup course semolina (suji)
1 cup sugar
1 cup boiling water
chopped cashews (optional)
sultanas or raisins (optional)
ghee

Method
  1. In a saucepan or wok, add some ghee and fry cashews (if using) on low heat. Once cashews start to change colour add sultanas (also if using). Fry both of them for a few seconds until cashews are golden brown and sultanas have puffed up.
  2. Add the semolina and add some more ghee if you think it is required. Fry until the semolina smells nice (sort of a ghee smell).
  3. Add sugar and boiling water and reduce heat to the lowest setting. Stir until the mix thickens to a dough consistency. This should not take more than 4 minutes.

Once cooled slightly this can be rolled into balls or served in a cup.


Labels: , ,